How to Improve my Email Deliverability? it’s a very common question from many growth marketers. Let’s find answers.
In 2022, nearly 56.5% of all emails were spam, according to DataProt. The amount of spam in email traffic varies from country to country.
India has one of the highest spam rates in the world. According to a report by DataProt, India had a spam rate of 85% in 2022. This means that for every 100 emails sent in India, 85 were spam. In the United States, the spam rate is 84%.
So, there are high chances that your cold email may end up in a spam folder. The good news is that you can easily prevent this if you know why this happens.
In this blog, we will explore why emails end up in spam, outline steps to ensure your emails land in the inbox, and guide you on how to react when your emails unfortunately land in spam.
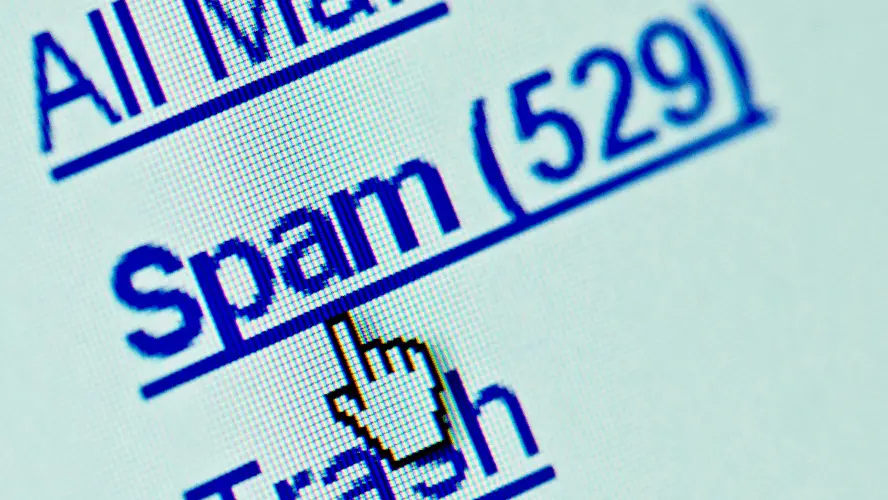
Why Do Emails End Up in Spam?
Let’s break down the top five reasons:
- The email appears as spam: This could be due to the visuals or technical elements, like including too many links or irrelevant attachments in the text.
- Bad list hygiene: This happens when your list contains contacts who didn’t subscribe willingly or have opted out but are still included.
- Bad sender reputation: This is influenced by your domain and IP reputation.
- Individual spam filters set by the subscriber: Your email may be caught by spam filters set by your subscribers.
- A mistake on the email service side: This happens when an email service mistakenly marks your email as spam.
1. Your Email Appears Like Spam
Spam filters will likely flag your email if it closely resembles a typical spam email. The content, including too many links, using shortened links, or attaching irrelevant files, can cause this.
Scammers commonly use these tactics, which spam filters recognize. In our next post, we’ll discuss more about what typical spam emails look like and how to avoid resembling them.
2. Bad List Hygiene
Good list hygiene means having a list with subscribers who are genuinely interested and have consented to receive your emails. On the flip side, bad list hygiene involves keeping subscribers who have clicked the “unsubscribe” link or adding contacts who didn’t willingly subscribe. This practice often leads to your emails being marked as spam, thus damaging your sender reputation.
3. Bad Sender Reputation
Your sender reputation depends on your sender domain and your IP reputation.
For example, if you consistently send relevant and engaging emails to your subscribers, your sender reputation will likely be positive. On the other hand, if you engage in spammy practices such as sending unsolicited emails or frequently being reported as spam, your reputation will suffer.
How to improve Sender Reputation, read more about startegies and tools here.
4. Individual Spam Filters Set by the Subscriber
Ultimately, the recipient of your email has control over whether your emails land in their inbox or spam folder. They can set their own filters which determine which emails should be considered spam. Unfortunately, even if you’ve done everything right, you may still end up in spam because of these personal filters.
5. Email Service Errors
Sometimes, an error on the email service side can result in marking your emails as spam. This is particularly common when your recipient uses their own email server. Even big email services like Gmail and Yahoo occasionally label legitimate emails as spam.
Now that we have examined the most prevalent reasons why emails land in spam, you are one step closer to mastering email deliverability.
5 Must Need Checklists to Pass Spam Filters
- Design Your Emails Correctly
- To avoid triggering spam filters, follow good email design principles. Keep text and images separate, use standardized fonts, and avoid excessive use of capital letters, exclamation marks, or phrases typically associated with spam.
- Use Honest and Clear Subject Lines
- Ensure that your subject lines accurately reflect the content of your email. Misleading subject lines can trigger spam filters and frustrate recipients.
- Obtain Consent Before Emailing
- Only send emails to contacts who have explicitly consented to receive them. This can be done through a checkbox on a registration form or a pop-up on your website.
- Implement a Double Opt-In Process (Email confirmation)
- Implement a two-step verification process where users must confirm their subscription to your mailing list. This ensures that your list only contains valid and interested contacts.
- Include an Opt-Out Link (Unsubscribe button)
- Include an easily accessible opt-out link, which is a legal requirement. This can prevent recipients from marking your emails as spam.
5 More Checklists to Pass Spam Filters
1. Maintain Your Email List
Regularly remove inactive contacts from your list. Poor list hygiene can harm your deliverability and IP reputation.
There are a number of ways to maintain your email list. You can use a tool like Mailchimp or Constant Contact to automatically remove inactive contacts from your list.
You can use Listclean or emaillistvalidation to improve the accuracy of your email list by identifying and removing invalid or inactive email addresses.
2. Use a Private Domain for Sending Emails
Enhance your credibility and reduce the likelihood of your emails being flagged as spam by sending emails from your own domain rather than public domains (like @gmail.com).
- It looks more professional. When you use your own domain, it looks like you are a legitimate business or organization. This can help to improve your credibility with potential customers or clients.
- It is less likely to be flagged as spam. Spam filters are more likely to flag emails from public domains as spam. This is because public domains are often used by spammers.
- It gives you more control. When you use your own domain, you have more control over your email marketing campaigns. You can choose the type of content you send, the frequency of your emails, and the target audience for your campaigns.
3. Set Up DKIM and SPF
These measures verify that an email claiming to originate from a specific domain is indeed authorized by the domain owner, thereby preventing spoofing.
- DKIM, which stands for DomainKeys Identified Mail, involves adding a digital signature to an email message. The signature is generated using a private key held by the domain owner. Upon receiving the email, the recipient’s mail server can utilize the public key (published in the domain’s DNS records) to verify the signature and confirm the email’s authenticity.
- SPF, or Sender Policy Framework, enables the specification of authorized mail servers for sending email on behalf of a particular domain. This information is published in the domain’s DNS records. When a recipient’s mail server receives an email, it checks the DNS records to determine if the sending mail server is authorized. Unauthorized servers may lead to email rejection or spam labeling.
4. Protect Your IP Reputation
Your IP reputation reflects the trustworthiness of your IP address as perceived by email servers and internet service providers (ISPs). It considers factors such as spam complaints, email bounce rates, and the quality of your email list.
Maintaining a good IP reputation is crucial for optimal email deliverability, ensuring that your emails reach recipients’ inboxes instead of being flagged as spam.
By following the previous “5 Must Need Checklists”, you can safeguard your IP reputation and achieve high engagement rates.
5. ESP Matching
Implement ESP matching, a technique used to identify the Email Service Provider (ESP) used by your recipients and send emails from the same ESP.
For instance, if you send an email from xyz@gmail.com to abc@gmail.com, utilizing the same ESP can reduce the chances of your email ending up in the spam folder. Unfortunately very few platforms available in the market offer ESP matching capabilities (Considering affordability).
How to Deal with IP Address and Domain Blacklisting
If your IP address or domain appears on a blacklist, it can significantly impact your email deliverability as email servers may be less inclined to accept emails from you. It is crucial to regularly check for blacklisting and take prompt action if you find yourself listed.
There are two types of blacklists:
- Blacklists based on the sender’s domain.
- Blacklists based on the sender’s IP address.
If either the domain or IP address is blacklisted, your mailings might encounter spam filters or, in the worst-case scenario, won’t be delivered at all.
Several factors can lead to your IP address or domain appearing on a blacklist.
For example, your server may have been compromised and exploited for spam sending. Alternatively, you might be dispatching excessive emails, or a significant number of recipients could be marking your email as spam.
If you discover that your IP address or domain is listed on a blacklist, it is essential to take steps to have it removed.
Identifying Your Blacklist: Using Tools to Determine Your Email Status
Firstly, you need to identify the specific blacklist that includes your information. Use tools, such as MxToolbox, DNSBL.info, DNS Checker, Sitechecker, Site24x7, and BlacklistMaster, can help you determine whether a blacklist has your IP address or domain.
To use these tools, input your IP address or domain name into the search field and select “Blacklist Check”.
Requesting Removal: Contacting the Blacklist Operator
Having identified the blacklist that has your data, you must then reach out to the blacklist operator and request the removal of your IP address or domain. Remember, each blacklist has its unique removal process for IP addresses and domains. Thus, you must follow the instructions provided by the specific blacklist operator.
Next, get in touch with the support team of the site hosting the blacklist with your data. Give a detailed account of the circumstances that led to the problem and explain the actions you’ve taken to rectify it. As soon as they verify that you’ve solved the problem, they will remove you from the list.
Keep in mind that removing your IP address or domain from a blacklist might take some time. During this period, you can still improve your email deliverability by adhering to email marketing best practices.
Some more tips:
- Sending email from a dedicated IP address
- Sending email to a warm list of subscribers
- Using a reputable email service provider
- Do not buy or rent recipient lists
- Don’t link to disreputable websites
- Drop shortened links
- Reduce email size: Some email services, such as Gmail, truncate emails that are over 102KB in size.
Let’s Summarise Our Email Deliverability Tips

By following all these best practices, you can improve your email deliverability and avoid being blacklisted in the future.
Now, If you believe there’s a mistake, for example, your reputation is low even though you’ve adhered to all the best practices, you can contact the email service directly through their sender contact form and ask for advice.
Contacting Email Provider Support
Provide your information, specify the issue, and wait for a response from the support team. It’s crucial to be polite, clear, and concise when explaining your problem.
Keep in mind that the support team may not respond immediately, so continue aiming for the inbox by following best practices, experimenting with sending tactics, and monitoring deliverability.
Google contact form to fix sender reputation
Outlook contact form to fix sender reputation
Our primary goal is to see your emails landing in the right folder. Don’t lose hope, stay dedicated, and keep refining your strategies. Good luck!